Setting up Storybook on an Astro project
7 min read
I really, really thought this was gonna be easy.
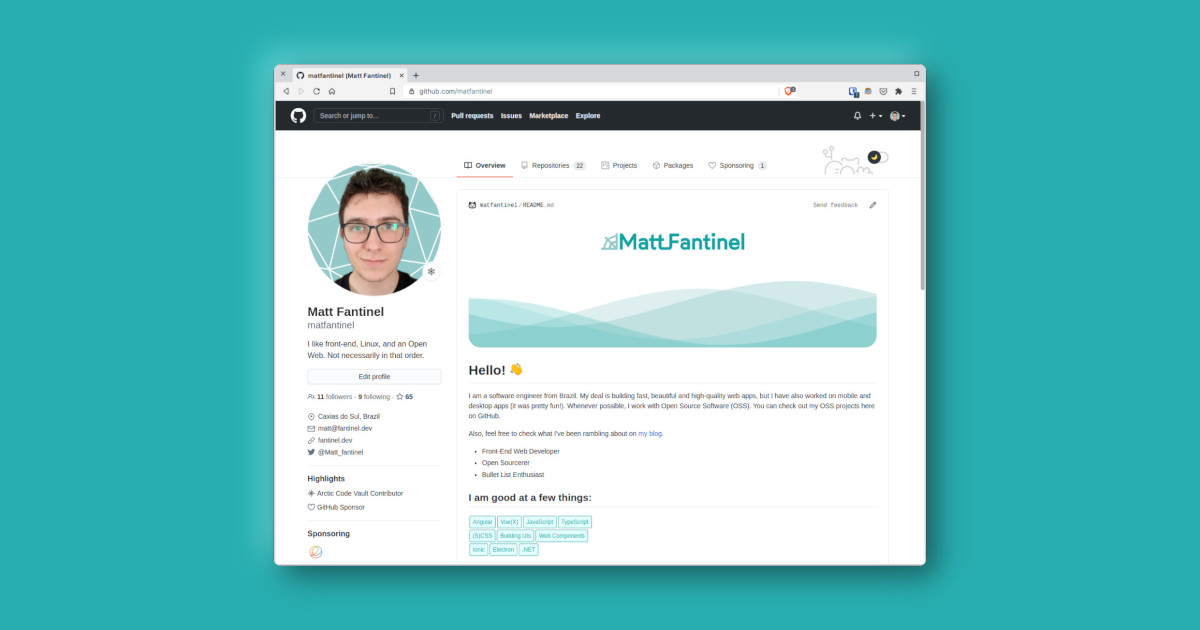
Last year, GitHub added a new cool feature for the user profile. You can now add a README file to it, and it will show up besides your profile pic. This is great for talking a bit about yourself and what you do, putting some contact info, or simply making a cool first impression.
For adding this to your profile, there's a little secret. Instead of an option in your "Edit Profile" settings, this is achieved by creating a new repository with the same name as your GitHub username.
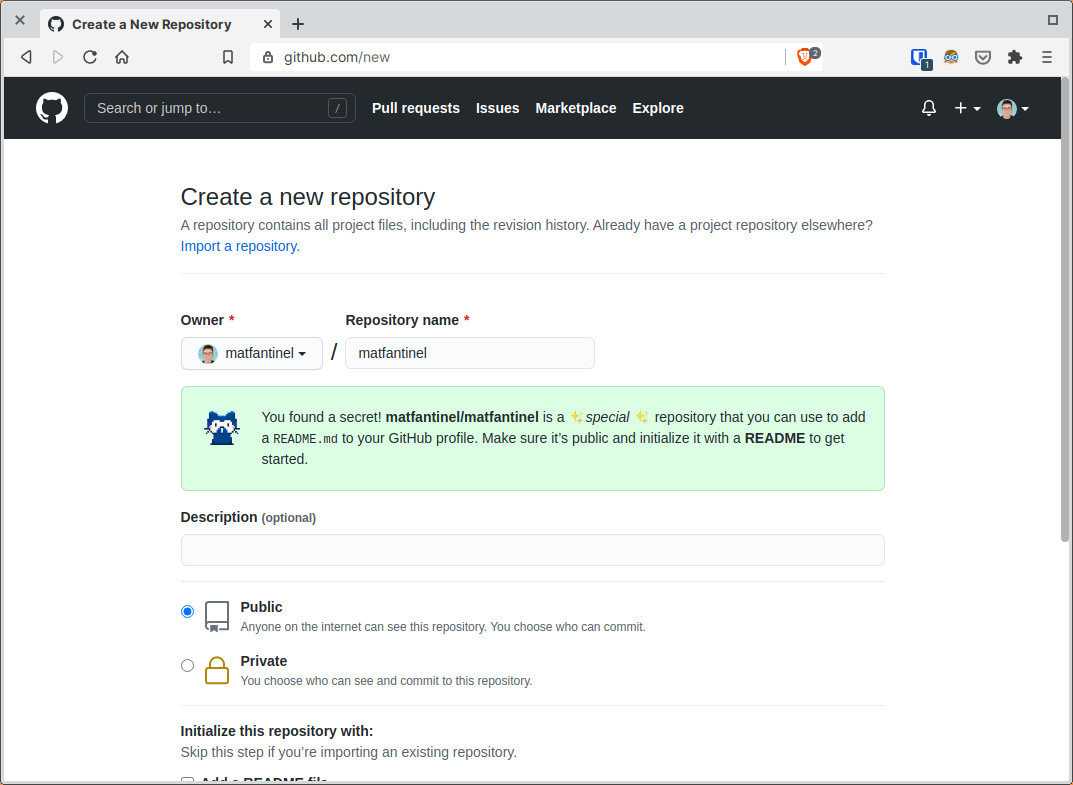
You can choose to initialize the repository with a README file already. After that, the content of this file will already start showing on your personal profile.
The README is just a Markdown file, which may make you think initially that you can only write in stuff with GitHub's default styling. However, when you get creative, there's a lot more you can do. You can add images and GIFs to it, sure, but SVGs are the real heros here. By adding SVG files to the Markdown file, you enable a lot of possibilities. SVG files support HTML tags and CSS styles (including animations!)
For adding HTML to the SVG, we can use the <foreignObject> tag. This is an element that can include elements from different XML namespaces. Which means that even though you're in a SVG namespace, you can use XHTML elements and all the features it supports, including the <style> tag for adding CSS.
As an example, check out the SVG file I use to add the "tags" with technologies to my profile:
<svg fill="none" viewBox="0 0 300 120" width="300" height="120" xmlns="http://www.w3.org/2000/svg">
	<foreignObject width="100%" height="100%">
		<div xmlns="http://www.w3.org/1999/xhtml">
			<style>
				.tags {
					display: flex;
					flex-wrap: wrap;
					height: 100%;
					width: 100%;
				}
				.tag {
					background-color: #e3ffff;
					border-radius: 0.25em;
					color: #0ca4a5;
					border: 1px solid #0ca4a5;
					display: inline-block;
					font-size: 0.75em;
					line-height: 2em;
					margin: 0.125em;
					padding: 0 0.5em;
					text-decoration: none;
					font-family: sans-serif;
				}
			</style>

			<div class="tags">
				<div class="tag">Angular</div>
				<div class="tag">Vue(X)</div>
				<div class="tag">JavaScript</div>
				<div class="tag">TypeScript</div>
			</div>
			<div class="tags">
				<div class="tag">(S)CSS</div>
				<div class="tag">Building UIs</div>
				<div class="tag">Web Components</div>
			</div>
			<div class="tags">
				<div class="tag">Ionic</div>
				<div class="tag">Electron</div>
				<div class="tag">.NET</div>
			</div>
		</div>
	</foreignObject>
</svg>
From there on, the possibilities are endless. On my profile, I added my personal logo SVG and the same drawing animation used on my own website.
Feel free to check out the source code to find out how it works.
Some people have compiled a list of amazing examples and inspirations for your profile. Some are minimalistic, others more complex, and some even get data from APIs (!). My favorite is this one from Livio Brunner, which definitely brings all the best things from 2000's web.
Setting up Storybook on an Astro project
7 min read
I really, really thought this was gonna be easy.
Separating my website's content from its code
4 min read
Having an open source website is great, but having the content stored in the same spot as the code has some issues. On this post I walk through what I did to keep them separated.
Automating Social Media Preview Images
6 min read
Social media preview images are very useful if you want to attract people to your website. They're sometimes a pain to create, though. Let's automate it!
Progressive Enhancement (and why it matters)
8 min read
Progressive Enhancement isn't just another web jargon; it's a guiding principle shaping modern web development.